Little Cloud Takedown
Little Cloud Troubleshooting
Forecaster Setup

Let’s get started with the Forecaster Snow Gun! In this article, we’ll walk through the basics of setting up your Forecaster Snow Gun so you can start pumping out snow!
Gather the Proper Equipment
- Forecaster Snow Gun
- Snow Gun Stand (Included)
- Water Filter (Included)
- Garden Hose
- Air Compressor (minimum 5 CFM @ 90 PSI) – More Info
- Pressure Washer (any)
- 10’ Air Hose (longer possible with limitations) – Learn More
- Extension cords for Air Compressor and Pressure Washer
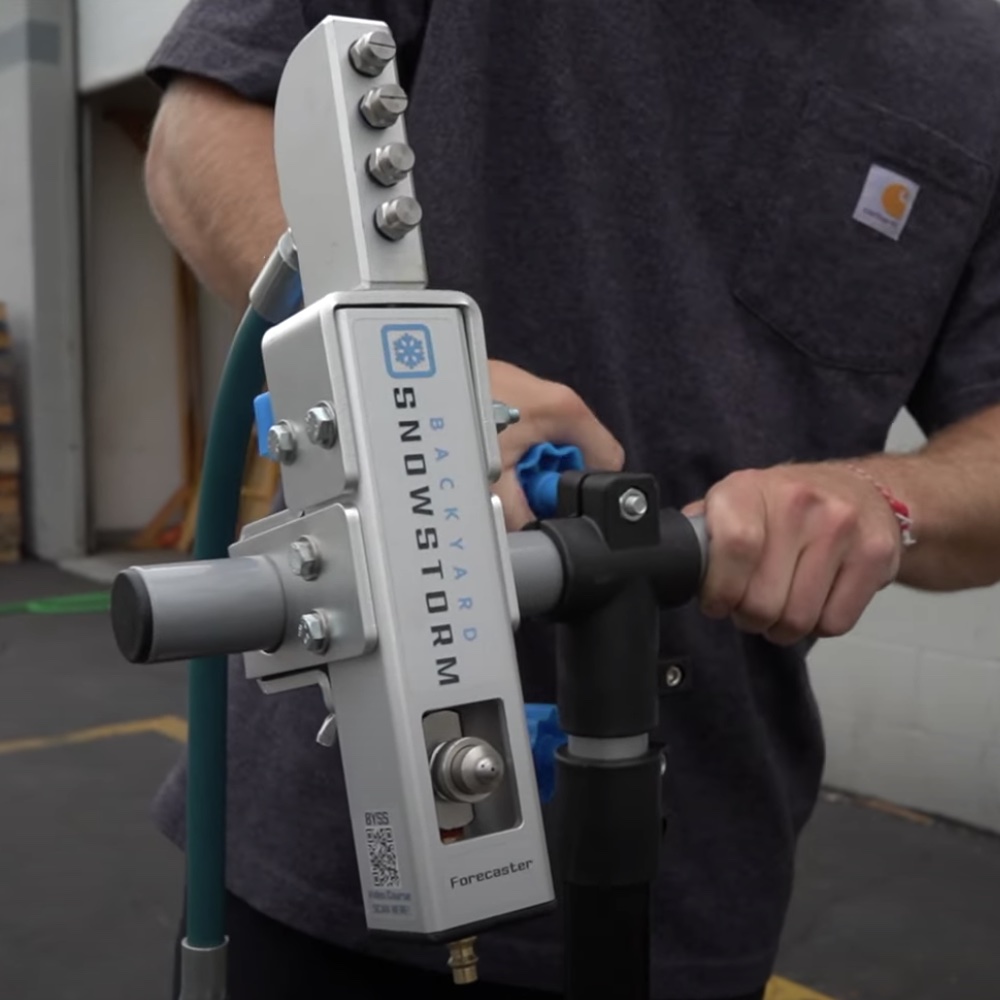
Insert the Proper Misting Nozzles

Determine your pressure washer’s flow rate in GPM, refer to the provided nozzle chart, wrap selected nozzles with Teflon tape, and tighten them securely into the snow gun head.
Position the Snow Gun and Stand
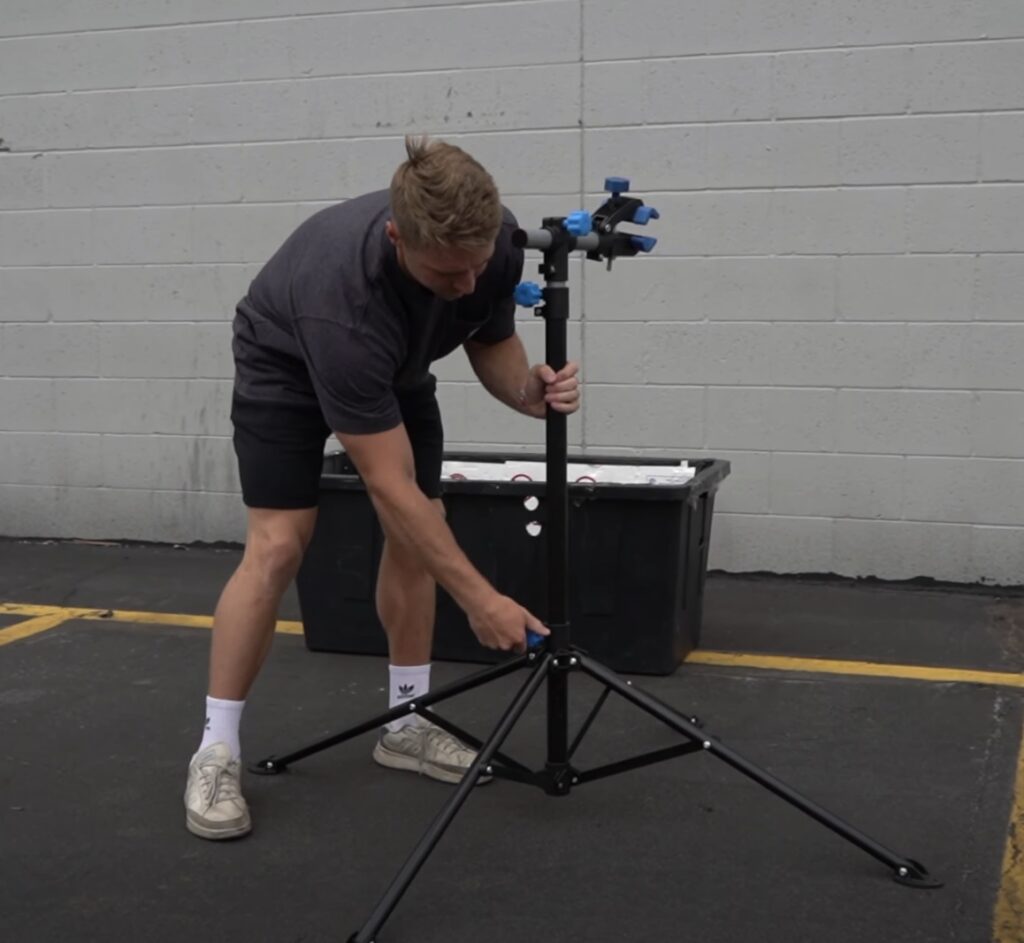
Place the stand in a convenient location. Ensure your garden hose, pressure washer, and air compressor all reach the gun comfortably.
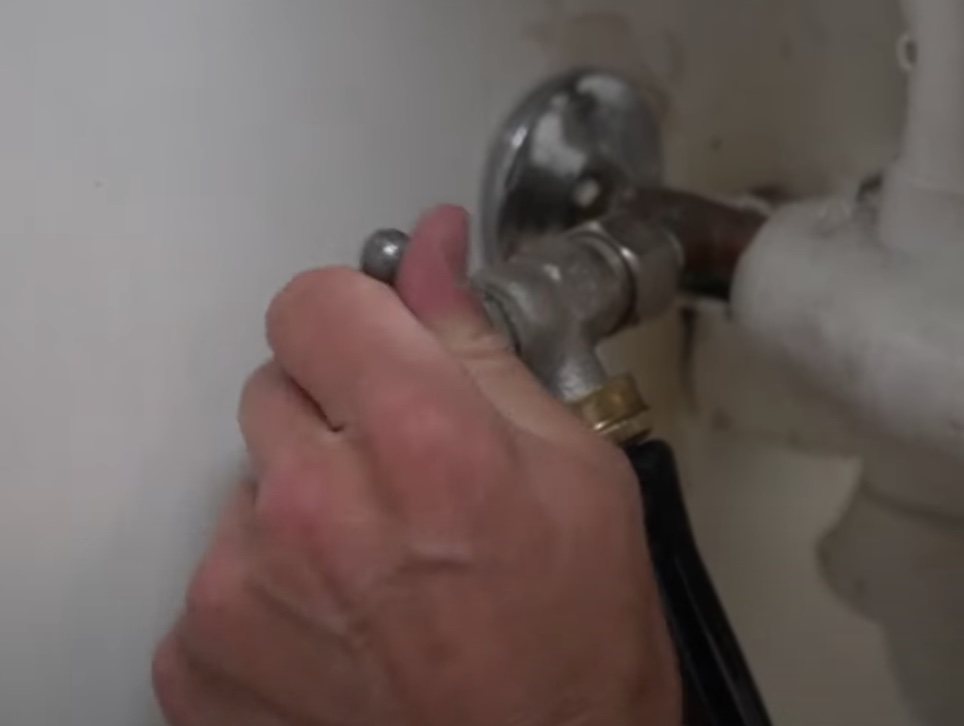
Connect the Water Line

Connect the hose from your spigot to the water filter, then into the pressure washer, and from the washer to the back of the snow gun. Add a pressure gauge before the gun if needed. More Info
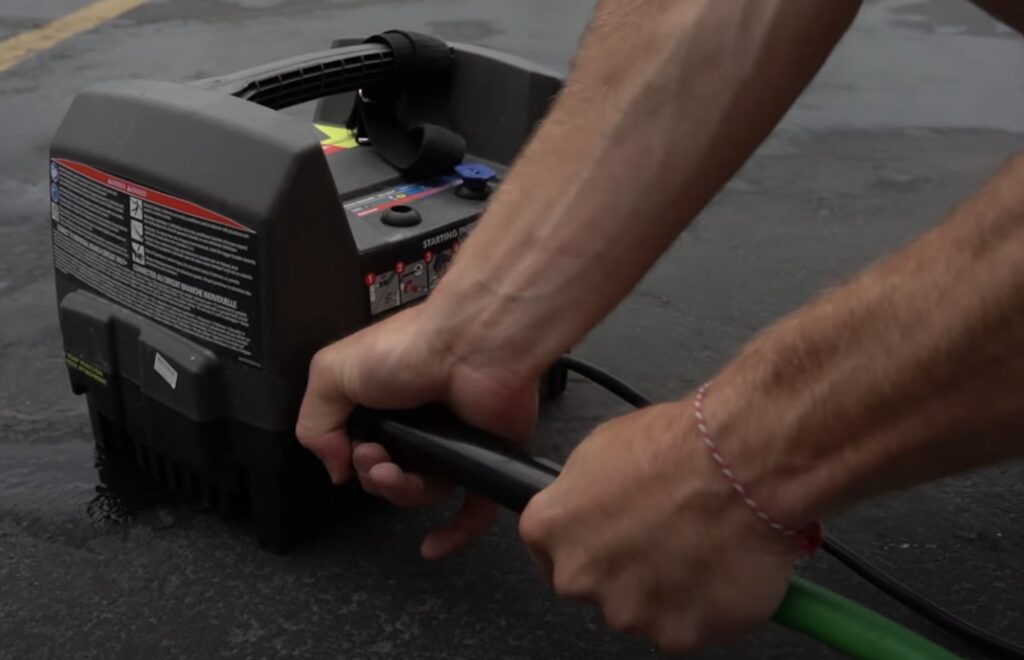
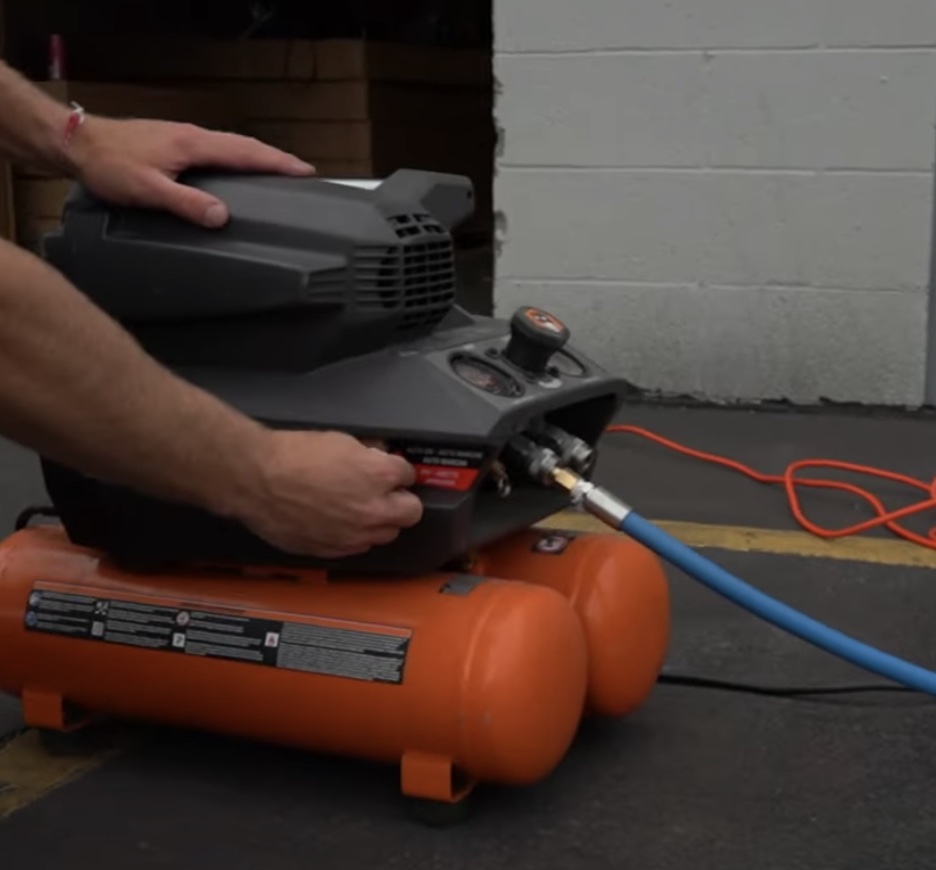
Position Air Compressor
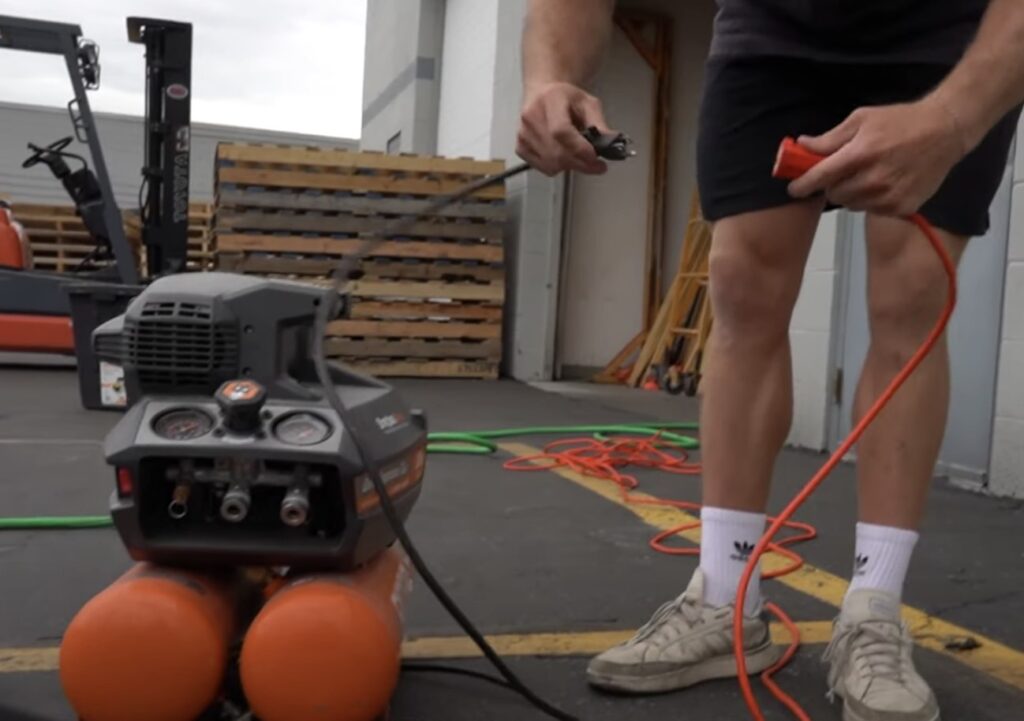
Position your compressor where it can connect to the gun with the air hose. Avoid placing it directly in the snow path. Plug in the compressor but leave it OFF.
Turn ON the Water and Pressure Washer
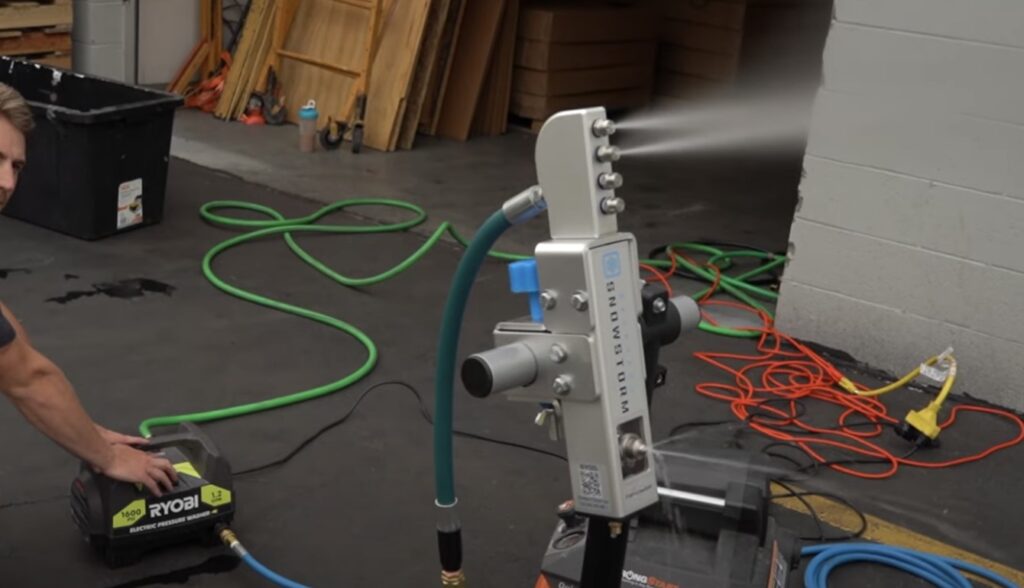
With everything connected, turn on the water. Water should begin flowing through the gun. Then turn on the pressure washer — you should see stronger streams from the top and bottom nozzles.
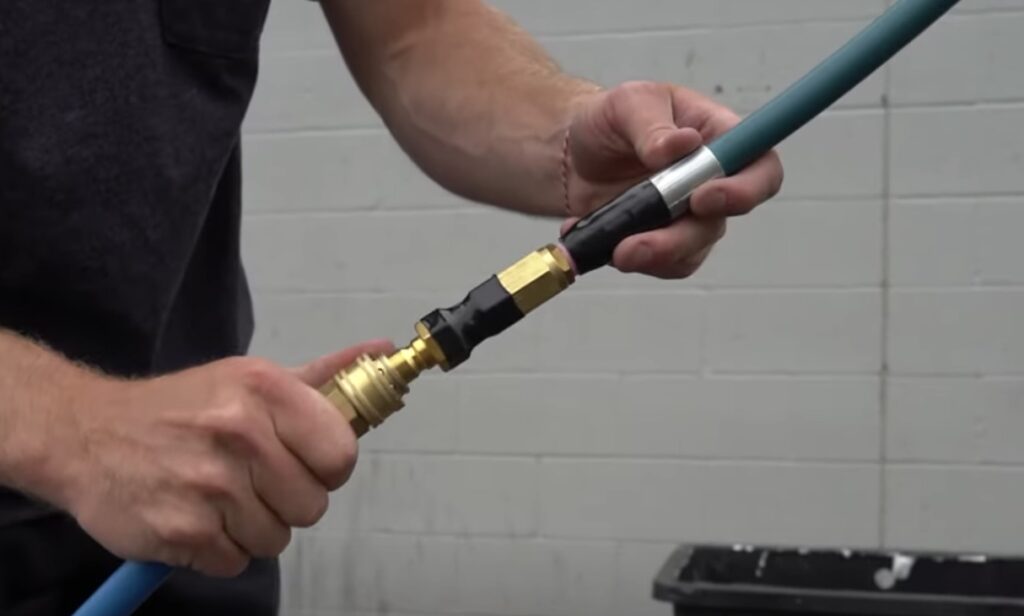
Connect the Air Hose and Turn ON Air Compressor
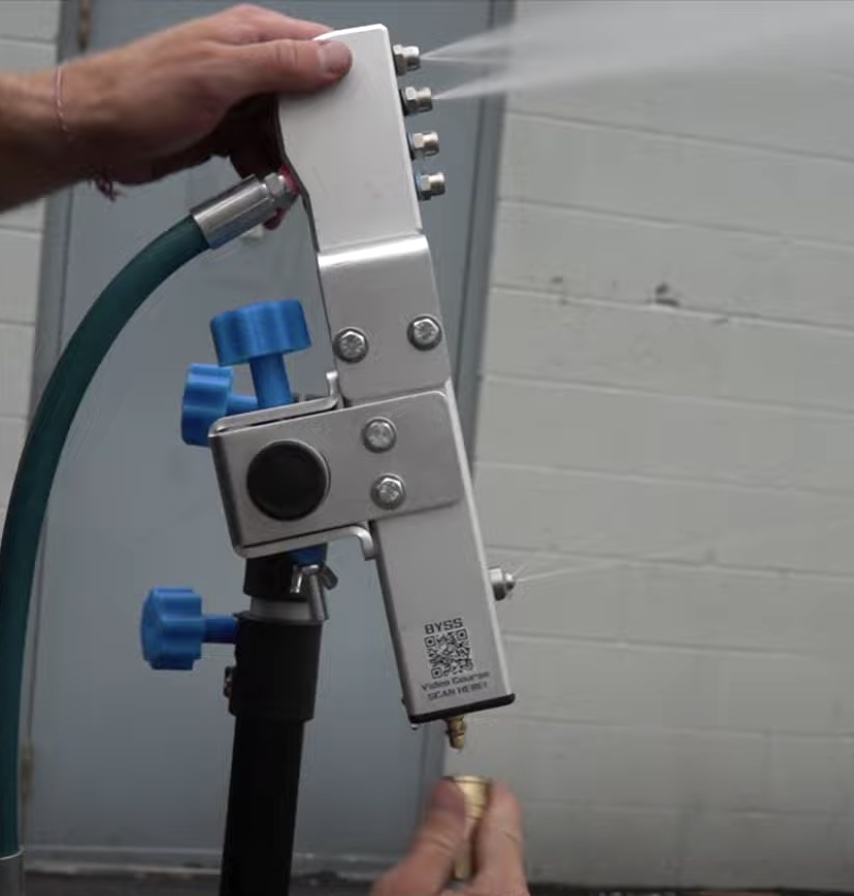
Plug the air hose into the snow gun and turn on the compressor. Wait for pressure to build. You should see a steady stream of air-water mix from the bottom nozzle. Pressure should exceed 60 PSI. More Info
Wait for the Snow to Build!
Once everything is flowing and the temperature is right — snow will begin to form. Enjoy!
Share:
Forecaster Instruction Manual